How to calibrate Xbox One controller sticks with reWASD
Just as reWASD 1.2 rolled in with the highly anticipated mouse emulation feature, many of you demanded some of the features that help you calibrate Xbox One controller. The newest version permits you to invert the Y and X axes on sticks, customize the deadzone to eliminate Xbox One controller stick drift in case if your Xbox One controller moves on its own, change the sticks response and some other features that change Xbox Elite controller stick settings the way that is comfortable for you. All these features work for Xbox Elite, One, 360, DualShock 3 and 4.
Modify Axis range to make a perfect Xbox One controller drift
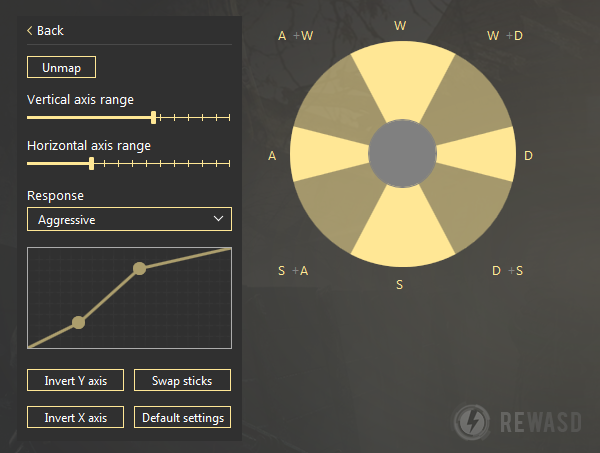
Look at this bad boy! Imagine, you've mapped WASD to Left stick. And now it's time to tune, where W+A, A+S, S+D and D+W will reproduce, and also where W, A, S, D will. The image is quite demonstrative itself, and it's tough to get lost. Needless to say, that this feature is irreplaceable to calibrate Xbox One controller!
Change stick response settings
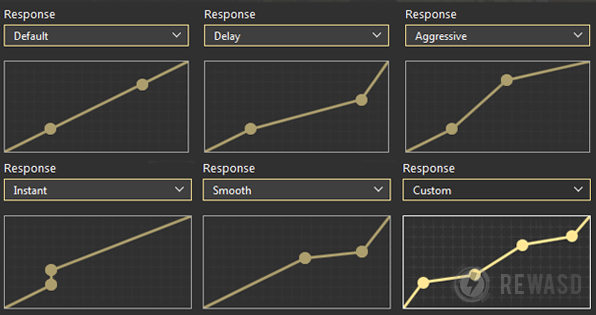
reWASD proposes 5 profiles (Delay, Aggressive, Instant, Smooth and Custom) that differ with the stick response curve. Thus, the Xbox One Elite controller stick sensitivity depends on those profiles. Note, that you can modify the Custom profile all you want. There’s a graph with the that demonstrates the details of existing profiles so you could see what profile is the best to choose. Although, it's always better to try them out in game, and pick the perfect one for you! Only you decide how they should perform.
Invert Y and X axes, Swap sticks
Last but not least new feature is about Y and X axes. Some gamers prefer the traditional stick directions, others choose the opposite way. It’s a thing you should decide for yourself. Once again reWASD gives you more freedom with Xbox Elite controller stick settings. Also, if you need to swap sticks, you can do it too! Just check this option if it is needed.
Note that if you have mapped something to Up or Down stick directions, “Invert Y axis” option is disabled because these two are a bit confusing together.
Eliminate Xbox One controller stick drift with stick deadzone
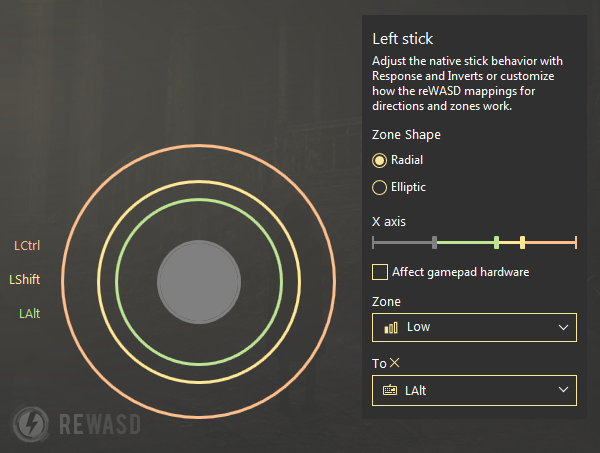
This must-have feature allows changing the deadzone for sticks. On the one hand, it will be possible to cure Xbox One controller stick drift and make your stick less sensitive (if your controller is not new, sticks are corrupted and they are delicate even if you're not touching ones). So if you notice that your Xbox One controller moves on its own, don't hesitate to use this feature. On the other hand, if you need to push tooth and nail to activate them — reWASD will make your sticks a little bit more sensitive.
How to calibrate Xbox One controller with reWASD
To configure all the features listed above you need to complete the following steps:
- Download reWASD — a free-to-try gamepad mapper.
- Connect your controller to PC. If one is connected — reWASD will indicate it below.
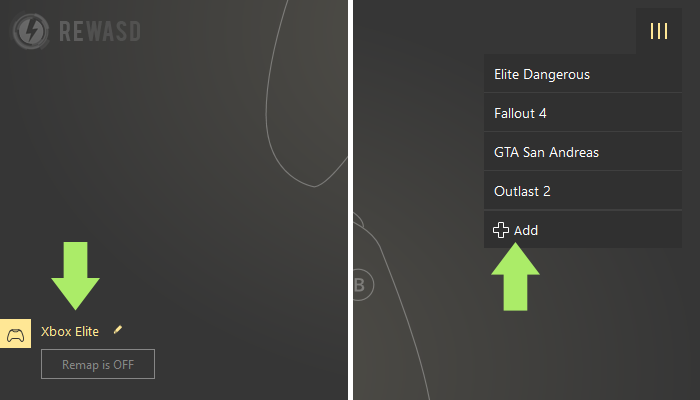
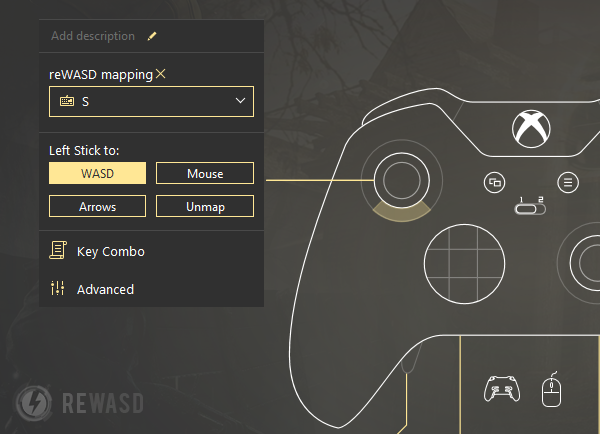
- Create a new profile, the config creates automatically. Start remapping! Press the stick you want to remap and set the desired buttons to directions. To calibrate Xbox One controller go to "Advanced".
- Start with axis range, then pick the needed stick response, and finally - choose to invert axes or swap sticks if needed.
Note that the inversion of Y and X axes works the best for native controller support.
- Now let's see what awaits on the right... Sticks zones? That’s where the tips for playing FPS games on PC (stick zones customization guide) will be irreplaceable. The next step is the “Deadzone”: note that the smaller the deadzone is the more sensitive your stick will be, so calibrate Xbox One controller wisely :)
- Once you’ve finished, you need to go “Back”, remap other controller buttons (if needed), click the “Apply” button.
- Voilà! You’ve finished your config.
Now you know how to calibrate Xbox One controller! It’s time to try out these new awesome features and fix the Xbox One controller that moves on its own, don’t waste your time and start remapping with reWASD! To keep your hand on the pulse concerning updates, gaming news and new configs you can subscribe to reWASD Pinterest board or Facebook page.
If you want to learn more about reWASD 1.3 novelties, check our previous blog post with the list of all new features that help map controller to keyboard like a pro.