How to remap mouse buttons with reWASD?
The latest version of reWASD gets the superpowers of a strong mouse macro software: now you can remap mouse buttons to keyboard keys, or controller buttons. This post describes all the tiniest details about making the mouse macro, and about how to remap mouse buttons.
What to start with?
- Download and install reWASD
- Pick the needed device in the bottom left corner. In this case, you’ll need a mouse or a group of devices that includes a mouse.
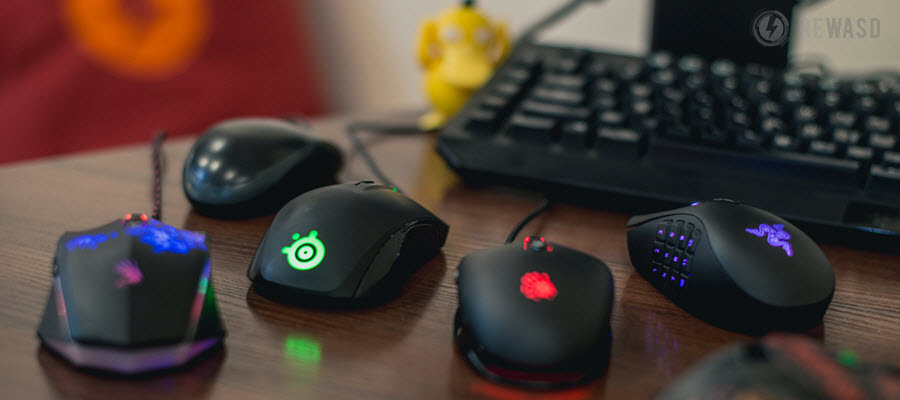
Disclaimer for all the gaming mouse owners: if you have a gaming mouse with programmable buttons we suggest checking the reWASD manual about mouse, to know more about this specific case. You need to complete a few more steps to use this mouse macro software in a full swing!
- Create a profile: press the menu in the upper right corner, and choose Add. The config creates automatically
If you pick a group of devices, you will also need to choose Mouse sub-config on the top of the screen.
- Review the virtual mouse settings: press the Virtual input device settings icon on the right side of reWASD window, and change the options you need
We insist on using Unmap function for all the mouse keys. Otherwise, the mappings you add can get messed up with the keys on your physical mouse. Also don’t forget that you’ll probably need the basic LMB and RMB clicks for navigation, so consider adding mappings via Activators or Shortcuts, or even adding a Shift layer of mappings to save the native layout.
Now you’re ready to remap!
Here’s the contents, so you could pick the option you’re interested in, and jump to the right place of an article:
- remap mouse buttons to keyboard keys
- make a rapid fire mouse macro
- assign a mapping to several mouse buttons pressed simultaneously
- make a mouse macro
- add an overlay with additional mappings to your mouse
- assign additional actions to double, triple, long mouse button presses
- make the mouse act like a stick
Remap mouse buttons to keyboard keys
There’s nothing complicated in this process actually: you change the output you get after you press a certain mouse button, or a combination of ones. reWASD permits to remap mouse buttons to keyboard keys, or to controller buttons if you wish.
Here’s how to remap mouse buttons:
- While the mouse config is chosen, choose the mouse button you want to remap
- Choose the needed mapping from another drop-down list on the right
- To emulate controller with mouse, scroll to the bottom of a list, and then pick the needed controller key
- Add other mappings, press Apply and it’s done!
Make a Rapid Fire mouse macro
Don’t hesitate to make a rapid fire mouse macro, we have two different types of these mappings: Turbo or Toggle.
Turbo allows to activate the mouse macro or a mouse key with the customizable pause between shots.
Toggle permits to imitate the pressed key: you click the button once and the key goes down, you click it once more and the key goes up.
To make a rapid fire mouse macro, follow these steps:
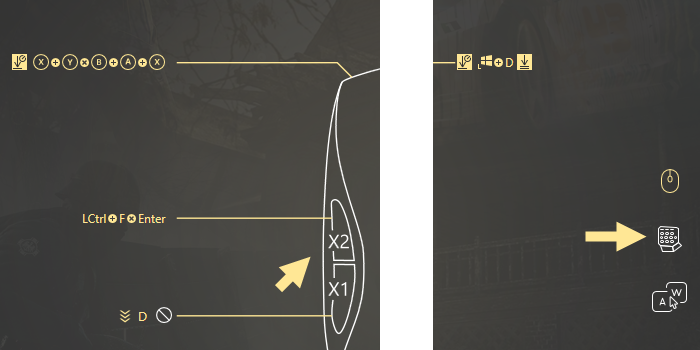
- Choose the mouse key you want to modify: from the main window directly, or from the Additional mouse buttons menu:
- Choose the mapping for rapid fire mouse macro from another drop-down list
- The next step will be picking the Turbo or Toggle option. Just check the needed feature, and set the pause in case you want to use Turbo
Don’t forget to unmap the button, or otherwise the mouse macro software won’t recognize the proper input for Turbo. reWASD will recognize the pressed and held button input, and Turbo with pauses will not work.
- Click Apply to keep the changes, and you’re ready to go!
Mouse shortcuts
In case you want to leave your regular mouse layout as it is, you can use Shortcuts option, and add the mouse shortcuts that will activate a certain mapping. The shortcut should contain 2, 3 or 4 buttons, and when you press them simultaneously the mappings fires.
Feel free to change the shortcut press time in preferences: the bigger it is, the longer reWASD will wait for you to press all the shortcut activators.
Follow these steps to add shortcuts:
- While the mouse config is chosen, press the Shortcuts icon (that is near the Main configuration)
- Click Add to create the new Shortcut
- Pick the mouse keys that will take part in the shortcut: you need to pick 2, 3 or 4 mouse keys
- Choose what mapping will reproduce when you activate the shortcut
Note, that to use a Toggled mouse macro assigned to the shortcut, you will need to press the shortcut the second time to turn off the Toggled mapping.
- Click Apply, and you’re good to go!
How to make a mouse macro?
You won’t find a way to stop me talking about reWASD features, and now it’s time to go to the basics. Our mouse macro software also permits to add a key sequence to the mouse button. Here’s how the combo editor looks like:
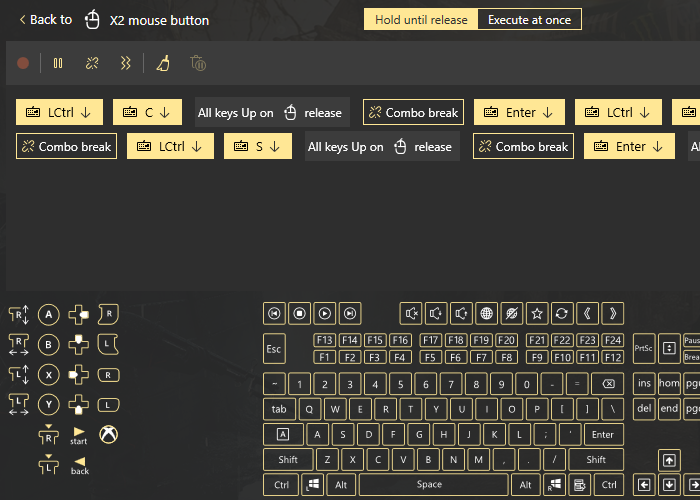
If you want to learn everything about the existing functions of the combo editor, we highly recommend to check out the manual about Key Combos.
To create a controller, keyboard or even mouse macro mapped to keyboard key, complete the following steps:
- Choose the mouse button you want to remap
- Pick Key Combo option in the frame on the right side
Note, that we suggest using Unmaps for mouse keys, so the native action did not bother the mapping you have added.
- Create the combo of controller buttons, or keyboard keys, or mouse clicks. Or all of ’em :)
- Press Apply to make the config active, and you’re done.
Make the overlay layout for your mouse with Shift mode
Shift mode is a feature that permits to add a layer of mappings that you can activate with a Shift modifier, and use the bindings you have added. Does this sound good to you? Say no more, and follow these steps:
- Choose the Shift 1 icon on the top of reWASD screen
- Pick the button that will serve as Shift modifier. Now you need to define the type: press-and-hold, or toggle. The first one permits to activate the additional layer while the modifier is pressed and held, the second one works like a light switcher: you press it once and the overlay is active, you press it once more and you’re back to the main layer.
Note, that if you create a config for a group of devices, you can choose the Shift modifier from the other device. For example, you create the config for a group that consists of keyboard, controller and mouse, and you set the Toggle Shift modifier to Right Bumper on the controller. Then, you can create a new layout for keyboard and mouse too, and it will be active when you press the Shift modifier on the controller.
- Start adding mappings to the new layer, and don’t forget to enrich it with some fabulous mouse macro. The process is exactly the same as if it was for regular mappings. Don’t forget to use unmaps!
- You can add 4 Shift layers of mappings. Don’t forget to leave a note for yourself from the future, and add the descriptions to mappings
- Once the Shifts are finished, press Apply, and try your config in action!
Add a mouse macro with Activators
reWASD permits to add double, triple, long activators, and a single press activator, which is a regular reWASD mapping. You can also add start and release press activators, which will reproduce right after a certain button is pressed or released responsively.
Note, that our mouse macro software doesn't permit to add key sequences to Start and Release press activators, only for single, double, triple and long presses. Check out the manual for Activators to know more about them.
Follow these steps to add a mouse macro to activators:
- Pick the mouse button you want to remap
- Choose the key you want to map the Activator to, and pick the type of Activator you want to assign. You can see all the activators on the top of the frame:
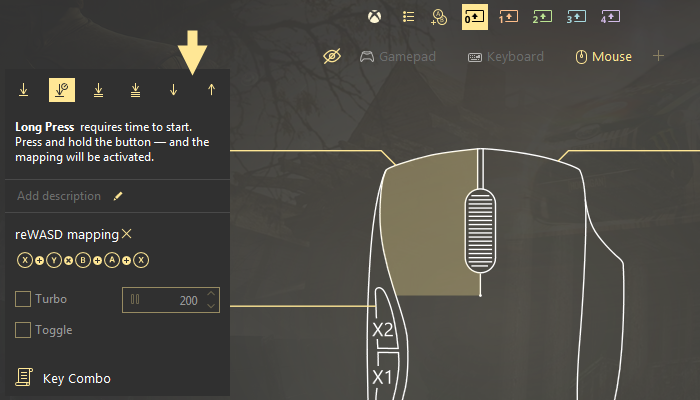
- Add the mappings, click Apply and you’re good to go.
Turn the mouse into a stick
You can easily make the mouse work as a stick, but it usually goes hand-by-hand with using keyboard and mouse as a controller. Also, to make the mouse work as a stick, you'll need to unmap it, so please check how to work with unmapped mouse.
Here’s how to remap mouse moves to stick:
- While the mouse config is chosen, choose the mouse directions indicated on the image of mouse
- Choose the needed mapping from the frame
- To emulate controller with mouse, unmap the mouse, and this will mute the native behavior
Learn more about remapping mouse moves to the Right stick, and all the Advanced mouse settings that you can tune!
- Add other mappings, press Apply and it’s done!
Let us know is we can help you with any questions you may have, and if you have any suggestions concerning this mouse macro software let us know in the comments below. Reach out to us wherever you feel comfortable: Discord text chat, on Facebook, or on reWASD Forum. Make sure to follow us on Pinterest, Reddit, and YouTube to keep your hand on the pulse.
You may also like
Accessibility Gaming: Customize Controls for Your Needs
How to Use Gyro Controls on PC